This post is about how to implement a vector field generated by Perlin noise directly on the GPU using GLSL. If you want, you can regard this as the step 0 before implementing fluid simulations with shaders. I have written elsewhere here about vector fields, and how to implement them on the CPU, but let’s recall the idea, and in particular the concept of a “lookup table”. Namely, in our case a lookup table is a two-dimensional array which encodes the vector field: you can imagine a grid with coordinates (i,j), such that to each of its cells a 2-dimensional vector is attached. The motion of a given particle in the vector field is obtained by displacing the particle in the cell (i,j) via the value of the lookup table at the given cell. To represent it on the screen, we compute the new position of the particle, and draw there. This seemingly redundant comment will be relevant later, just wait.
Okay, the procedure above is easy-peasy, if we want to move pixels, we just define a grid as big as the whole screen, so that the cell (i,j) will correspond to the pixel at position (i,j) indeed; we do the computations above, and go home. Boom! Ehm, no, not really. The point is that if you tried to do just that, the iteration over all the pixels in the screen would take so long that you would get barely a frame or two every couple of seconds (probably less). Sorry, about that.
Enter shaders! We can indeed use the GPU to perform all these calculations via a custom made fragment shader. First, we need to sort out how to send the information contained in the lookup table to the shader. Since the table is nothing else than a two-dimensional array, we can write the value of the field directly in a texture. On modern graphic cards, textures are very quick to upload, and we can upload more than one. Wait a minute, aren’t textures supposed to be used for… colors and stuff? Yes, but. A texture is nothing else that a carrier for data: more precisely, at each of its coordinate, it contains the value of red, green, blue and alpha which will be combined to provide the color for the pixel at the given coordinate. We can then use two of the color channels to provide the x and y component of a vector. In this case, I have chosen a unit vector field, i.e. at each point the vector is specified just by an angle, given by the value of Perlin noise at the given coordinate. This datum is written on the blue channel of the ofImage field in the code, from which we will obtain a texture. Another texture will contain the pixels we want to displace: I will refer to it as the “ink” texture. Finally to update the ink texture we will use a “ping-pong technique”, about which I have written here.
Now that we have sorted out a slick way to send data to the GPU, we have to deal with the elephant in the room. As I commented earlier, the CPU algorithm is based on the fact that we calculate the new position of the particle at (x,y) by obtaining the value of the vector field at the very same position, move the particle, and draw something (a circle, a pixel, etc.) “there”. Unfortunately, the fragment shader does not allow to “move” fragments, since everything it knows is the given fragment! This is encapsulated in my favourite motto concerning shaders “It is a lonely world, no one talks to no one else here!”: this means that everything we know about a vertex or a fragment can’t be shared.
Luckily, there is a way out, and it comes courtesy of textures. A texture can indeed be “looked up” from any fragment: so, instead of moving the particle, we trace back its motion. In other words, if we are at the fragment in position p, instead of saying “go to the fragment p + field(p) and draw my color”, we say “the color at p is the color of the ink texture at p-field(p)”. There is an explanation why this is a sensible idea, and it has to do with (partial) differential equations, and their (local) flows.
We can now look at the code in openFrameworks, where I have added some mouse interactivity for fun. Notice you need to provide an image to start with.
ofMain.cpp
#include "ofMain.h"
#include "ofApp.h"
//========================================================================
int main( ){
ofGLFWWindowSettings settings;
settings.setGLVersion(3, 2); //we define the OpenGL version we want to use
settings.setSize(1024, 680);
ofCreateWindow(settings);
// this kicks off the running of my app
ofRunApp(new ofApp());
void keyPressed(int key);
void keyReleased(int key);
void mouseMoved(int x, int y );
void mouseDragged(int x, int y, int button);
void mousePressed(int x, int y, int button);
void mouseReleased(int x, int y, int button);
void mouseEntered(int x, int y);
void mouseExited(int x, int y);
void windowResized(int w, int h);
void dragEvent(ofDragInfo dragInfo);
void gotMessage(ofMessage msg);
//Setting up the lookup table
ofPixels pix = field.getPixelsRef();
for (float x = 0; x < ofGetWidth(); x++) {
for (float y = 0; y < ofGetHeight(); y++) {
float st = ofNoise(x * 0.0001, y * 0.0001);
pix.setColor(x, y, ofColor(0.0, 0.0, st * 2.0 ));
A better result can be obtained by interpolating on the output color, but I was lazy.
Why did I mention that this is step 0 in understanding how to implement a fluid simulation (like smoke, dust, etc.) on the GPU? This is related to the fact that the vector field in this case is *fixed*, i.e. it is an external vector field. In a fluid, the velocity field is a solution to the Navier-Stokes equations which can be exactly solved for very few cases, and it is “advected”, i.e. you have to imagine that it gets transported itself by the fluid. A nice article on these topics can be found here: if you get comfortable with the basic concepts in this post, you will able to follow it, modulo probably some of the maths.
Nowadays there are tons of libraries to do fluid simulations, like for instance ofxFluids, ofxFlowTools, etc. Why bother, then? I could say because understanding things is always better, but the truth is I do not have the answer to this question: you will have to find your own.
Who doesn’t like ribbons? I know that I do, and that I always found them fascinating. There are tons of ways one can make ribbons which are dynamic, i.e. they interact with the user in some ways. For this simple code, I used openFrameworks, since I wanted to work with reacting meshes and 3D graphics. The idea is pretty simple: you basically add pair of vertices to the mesh by first having one of the vertex’s position follow the mouse position, and compute the position at the other end as the “head” of an orthogonal vector. Wait, what?! It sounds complicated, but it really isn’t. The interesting thing in the code is that there is a variable, namely N, which bounds the total number of vertices: otherwise, after a while you will find yourself with a HUGE mesh, the framerate will drop considerably, and you’ll think your life is miserable. So, let’s avoid that!
Here is the code
void keyPressed(int key);
void keyReleased(int key);
void mouseMoved(int x, int y );
void mouseDragged(int x, int y, int button);
void mousePressed(int x, int y, int button);
void mouseReleased(int x, int y, int button);
void mouseEntered(int x, int y);
void mouseExited(int x, int y);
void windowResized(int w, int h);
void dragEvent(ofDragInfo dragInfo);
void gotMessage(ofMessage msg);
};
ofApp.cpp
#include "ofApp.h"
#define N 1000
//--------------------------------------------------------------
void ofApp::setup(){
ofBackground(ofColor::lightGray);
ofToggleFullscreen();
ofHideCursor();
I am very much fascinated by data, its retrieval and possible applications to art. We are constantly surrounded by data in text, visual and auditory form, and they tell something about us all, as a society and a species.
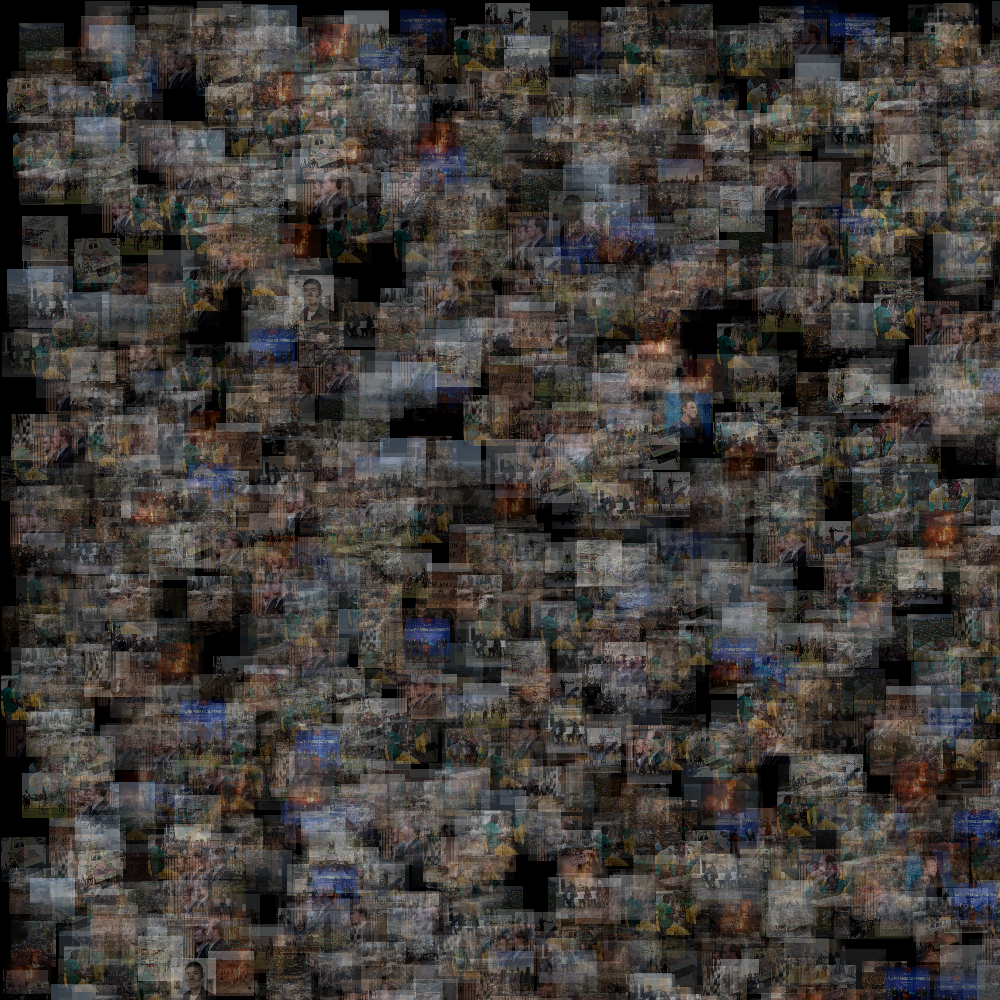
In this post I want to write about a simple scenario. Imagine we want to retrieve all the images appearing on a newspaper page, and do something with that. For this simple case, I have chosen The New York Times. We have then a couple of questions to which we want to answer. First of all, how do we get the urls of all the images present in the given page? And second: how do we get these images without compromising the animation happening? To answer these questions, we start at the beginning, and we stop at the end, like the judge suggests Alice during her trial. 😉
Data contained in a webpage is usually represented via a markup language: for instance, HTML is such a language. In a markup language, the different structural pieces of a webpage are “tagged”: each item might have a “title” tag, for instance, which tells us that its content will be a title of a sort. In the present case, we will use XML, since The New York Times provides a .xml file for its various pages. In XML parlance, a xml file can be thought as a collection of boxes called “children” that can contain objects which have “content”, or other boxes which have other children, and so on. Now, each XML file is structured in a slightly different way, so one has to investigate case by case. For instance, you could have problem lifting the very same code that will appear later to, say, The Guardian, since its xml file can have a different arrangement.
Processing offers a class XML to deal with XML files, and to search through its tags. Great! So, after spending some time investigating the RSS feed of the home page of The New York Times, we discover that the XML has a child called “channel”, which inside contains children tagged “item”, which themselves contain a child tagged “media:content”: finally, this child contains a url, which is what we are interested in. Pheeew! Once we get the list of urls, we can download the images with loadImage(), which accepts also urls. Here the problem addressed in the second question above appears. We have to talk about “asynchronicity”. Namely, both the function loadXML() and loadImage() are so called “blocking functions”: in other words, until they complete their task, the code doesn’t go forward. This means that any animation would stutter. If we need to load the images only once, this is not a great problem: we do everything in the setup() function, and forget about it. For the sake of fun, I have decided that I would like to randomly add a new image from some other page while the animation goes on. The way to circumnavigate the problem created by these blocking functions is to use a different “thread”. What does this mean? Java allows to “thread functions”, which means that the function is executed in parallel with the main thread, which in our case is given by the so called “animation” thread. By threading a function, we allow the main thread not to be affected by any slowing of the threaded function. In our case, the function getData() loads up another .xml file, grabs an image, and adds it to the list of images to display.
We can now look at the code
xml = loadXML(url); //Loading the XML file;
String[] names = {};
XML[] children = xml.getChildren("channel"); //This is the first child of the XML file;
for (int i = 0; i < children.length; i++) {
XML[] items = children[i].getChildren("item"); //Images are cointained in items;
for (int j = 0; j < items.length; j++) {
XML media = items[j].getChild("media:content"); //Media:content is the tag that cointains images;
if (media != null) {
names = append(names, media.getString("url")); //This provides the url which appears as an option in the tag media:content;
}
}
}
for (int i = 0; i < names.length; i++) {
images.add(loadImage(names[i]));
println("Uploaded!");
}
}
void draw() {
PImage im = images.get(count % images.size());
void getData() {
locked = true;
url = urls[int(random(0, urls.length))]; //Choose a random url among those available;
xml = loadXML(url);
String[] names = {};
XML[] children = xml.getChildren("channel");
for (int i = 0; i < children.length; i++) {
XML[] items = children[i].getChildren("item");
for (int j = 0; j < items.length; j++) {
XML media = items[j].getChild("media:content");
if (media != null) {
names = append(names, media.getString("url"));
}
}
}
images.add(loadImage(names[int(random(0, names.length))])); //Add the new image to the main list;
locked = false;
}
If you run the code, you should get something like
As an exercise, try to do something similar with a different website, so to get comfortable with the process of understanding how the given XML file is organized.
Combining some techniques from the previous posts on shaders, here’s the render of an audio reactive application which I used for a video of “Overlook”, a track of my musical alter ego
The code uses vertex and fragment shaders to create a glitchy environment which reacts to the audio in real time.
The track “Overlook” is available for listening here
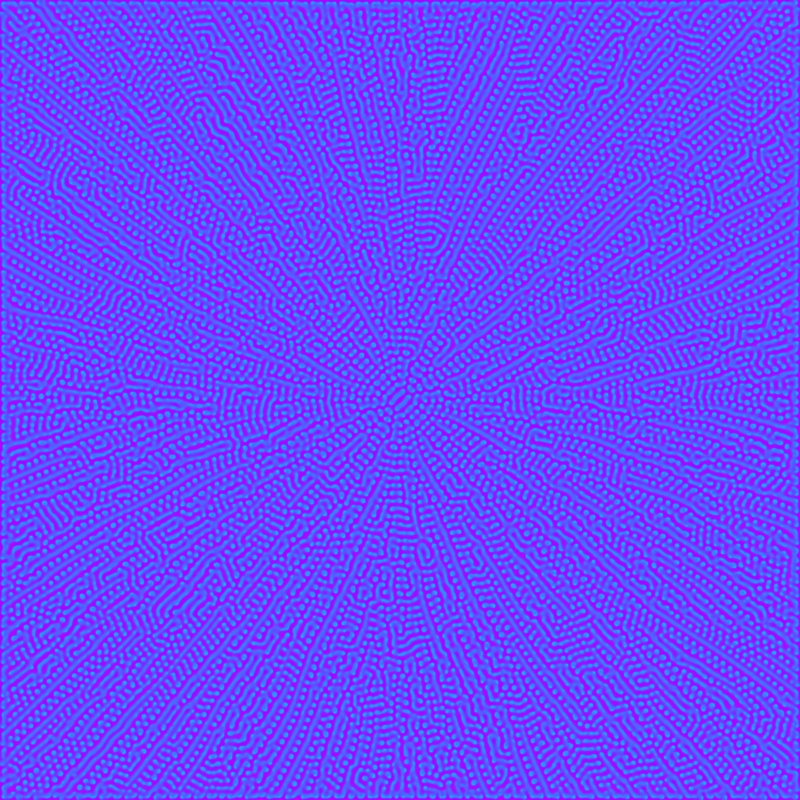
Reaction-Diffusion algorithms are very fascinating, since they are capable of producing incredibly organic patterns. They can also be computationally expensive if the grid of choice is fine enough. In a nutshell, we regard every pixel of an image as a cell containing two types of chemicals in different proportions, and whose combination produces a given color on the screen. The “diffusion equation” is such that, as time goes on, the proportion of the two chemicals changes according to that of the neighborhood cells. Since the algorithm is pixel* based, at its finest, we might think this is a job for a fragment shader. And that’s indeed the case! We have to be careful though concerning two aspects. First, the algorithm uses information about the adjacent pixels, and we know that a fragment shader only treats fragment by fragment information, it does not allow sharing among fragments. This is solved by using a texture to store information about the chemicals. This brings us to the second point: we need to store the previous state of the chemical proportions to compute the next one. On the other hand, a shader is not “persistent”, in the sense that all the information it has concerning fragments is lost on the next frame. Enter FBO and ping-pong technique! Framebuffer objects allows what is called “off-screen rendering”. In other words, instead of rendering the pixels directly to screen, they are rendered to a buffer, and only later displayed to the screen. Hence, we can pass the FBO as a texture to the shader, use, say, the red and green values of the texture at the given fragment coordinate as our chemicals percentage, and set the color of the fragment using the new values of the percentages. This technique is usually referred to as “ping-pong technique”, because we go back and forth from the buffer to the screen. It is particularly useful for modelling particle systems directly on the GPU. In Processing, a FBO is an object described by the class PGraphics, and the shader becomes a method that can be sent to the object.
Here’s the code
float A = texture2D(texture, vertTexCoord.st )[0] ;
float B = texture2D(texture, vertTexCoord.st )[1] ;
float A_1 = A + (0.9 * laplaceA(vertTexCoord.st, u , v) - A * B * B + 0.0545 * (1 - A)) ;
float B_1 = B + ( 0.18 * laplaceB(vertTexCoord.st, u, v) + A * B * B - (0.062 + 0.0545) * B) ;
gl_FragColor = vec4(A_1, B_1, 1.0, 1.0);
}
And here is an example:
Tip: try to change the numerical values in the definition of A_1 and B_1 in the fragment shader code.
*: A fragment shader technically deals with fragments rather than pixels.
Here’s a little exercise concerning voicings management in SuperCollider. The idea is very simple: we have a collection of samples we would like to trig randomly, but a retrig is allowed only if the whole sample has finished playing. To do this we have to keep track of active Synths (or “voices”), in order to avoid retriggering those. This role is played by the array ~voices: indeed, the index of the array identifies the buffer to be played, while a value of 0 or 1 denotes an available or unavailable voice, respectively. At the moment of the instantiation of a Synth on the server, SuperCollider allows us to assign a function to be executed when the given synth is free, which in our case sets the ~voices value corresponding to the given buffer to 0. In the infinite loop cycle we can then check for the value of ~voices at a random position i: if this value is 0, we create a new Synth with the corresponding buffer, and set the correspondent voice number to 1. Otherwise, we continue with the inf cycle. By changing the values in the rrand function you can decide how sparse the various instances will be.
You can use this technique with any type of SynthDef, in order to have a fixed voice system which does not allow retriggering or voice stealing. Also, the way I have done it is not the most elegant one: you can search for NodeWatcher (a way to monitor Nodes on the server) for an alternative approach.
Here’s the code
All the samples have to be in a folder called “sounds” inside the same folder your .scd file is. I have used some few piano samples from Freesounds.org, since I wanted to achieve a minimalist piano atmosphere. Here’s how it sounds
Audio clip: Adobe Flash Player (version 9 or above) is required to play this audio clip. Download the latest version here. You also need to have JavaScript enabled in your browser.
We have already discussed the advantage of using shaders to create interesting visual effects. This time we will have to deal with fragment shaders *and* vertex shaders. In a nutshell, a vertex shader takes care of managing the vertices position, color, etc. which are then passed as “fragments” to the fragment shader for rasterization. “OMG, this is so abstract!!”. Yeah, it is less abstract than it seems, but nevertheless it requires some know how. As previously, I really suggest this : I find myself going back and forth to it regularly, always learning new things.
Good, so, what’s the plan? The main idea in the following code is to use a PShape object to encode all the vertices: we basically are making a star shaped thing out of rectangles, which in 3d graphics parlance are referred to as “quads”. Once we have created such a PShape object, we will not have to deal with the position of vertices anymore: all the change in the geometry will be dealt by the GPU! Why is this exciting? It’s because the GPU is much much faster at doing such things than the CPU. This allows in particular for real-time reactive fun. Indeed, the code gets input from the microphone and the webcam, separately. More precisely, each frame coming from the webcam is passed to the shader to be used as a texture for each quad. On the other hand, the microphone audio is monitored, and its amplitude controls the variable t, which in turns control the rotation (in Processing) and more importantly the jittering in the vertex shader. Notice that the fragment shader doesn’t do anything out of the ordinary here, just apply a texture.
Here’s how the code looks like
Notice the call to reset the shader, which allows to show a gradient background, loaded as an image, without it being affected by the shader program.
Here’s a render of it, recorded while making some continuous noise, a.k.a. singing.
Try it while listening to some music, it’s really fun!
Yesterday I have been to the beautiful exhibition by Pe Lang at the Museum of Digital Art here in Zurich. The exhibition consists of several kinetic systems producing complex behaviours. I was in particular fascinated by a piece called “polarization”, where different disks with polarized filters provide very interesting visual patterns. Those who read this blog know that I am really into systems, and their emergent features, so I was inspired to make the following piece, called “Worlds”. It is also an excuse to show how object oriented programming allows very quickly to replicate a little “cosmos” over and over.
The idea is the following. We have discussed more than once systems of particles which bounce on the canvas, but we never gave the canvas its own ontological properties, a fancy way to say that we never considered the canvas to be an object itself. That’s precisely what is going on in the code below. Namely, there is a class World whose scope is to be the box in which the particles are bound to reside. It comes with a position vector for its center, with a (half) length for the box itself, and with a particle system. The bounce check is done internally to the class World, in the update() function, so to make it behave like its own little universe. Once you have such a gadget, it’s immediate to replicate it over and over again! I disposed the box in a simple array, and I really like the visual effect that comes from it. I also did something else: inspired by statistical mechanics, each box has a “temperature”, which is influenced by how often the particles bounce on the walls of the box. The “hotter” the box, the more red it becomes. There is also a cooling factor: each box tends to cool down. So, after some time, the system goes to equilibrium, and each box stabilizes on a shade of red. This shows also something very nice, and at first counter-intuitive: there are boxes with a lot of particles, which are though very slow, making the box very “cold”.
Here is the code
// Worlds
// Kimri 2018
ArrayList<World> boxes;
int n = 10;
void setup(){
size(1000, 1000);
init();
frameRate(30);
}
void draw(){
background(255);
for (int i = 0; i < boxes.size(); i++){
World w = boxes.get(i);
w.display();
w.update();
}
}
void init(){
background(255);
boxes = new ArrayList<World>();
float step = width/n;
//Generate the array of boxes;
for (float x = step; x < width; x+= step){
for (float y = step; y < height; y+= step){
boxes.add(new World(x, y, step * 0.4));
}
}
}
void keyPressed(){
init();
}
// World class
class World {
PVector pos;
int num;
float len;
float temp = 255;
float coeff = 1.7;
ArrayList<Particle> particles;
World(float _x, float _y, float _len) {
pos = new PVector(_x, _y);
len = _len;
num = int (random(10, 60));
//Add particles to the box
particles = new ArrayList<Particle>();
for (int i = 0; i < num; i++) {
float part_x = pos.x + random(-len, len);
float part_y = pos.y + random(-len, len);
particles.add(new Particle(new PVector(part_x, part_y)));
}
}
World(float _x, float _y, float _len, int _num) {
pos = new PVector(_x, _y);
len = _len;
num = _num;
//Add particles to the box
particles = new ArrayList<Particle>();
for (int i = 0; i < num; i++) {
float part_x = pos.x + random(-len, len);
float part_y = pos.y + random(-len, len);
particles.add(new Particle(new PVector(part_x, part_y)));
}
}
This blog has been dormient for over a year, now. Probably nobody asked this, and nobody cares, but: where have I been? Due to a major computer failure, the effect of which was a loss of months of work, for a long time I have substantially reduced my coding activity. I guess I also needed time to see things from a distance.
I didn’t stop creative activities, though: I used the time in between to work on music, which had been buried under many lines of codes during the recent years.
If you are interested, you can check some outcomes here
and here
I plan to come back to coding soon, maybe I’ll talk about a couple of ideas I have which involve poetry generation for an art installation.